Pages

Wednesday, March 26, 2014

Working with DAC repository metadata tables

Question: How to find DAC(Oracle Data Warehouse Administration Console) metadata tables or repository tables information. 

  DAC has a decent feature to export the records which you are able to see it from DAC console.

Ex:- Tasks, Tables, Subject Areas, Indexes, Execution plans....etc.

 With this feature, you can export all Tasks, Subject Areas, Tables information to CSV file for some analysis.

 If you can closely observe( most of the people might not come across), the below images, you will find some awesome information here.


DAC Right click menu

Click on "Output to file" option. This will ask you to provide some output file name. But by default it provides some name.

 Here is the important information. The default file name is the exact repository/metadata table name.(Marked in Red colour)

Dac subject area metadata table name

Some list of DAC metadata tables.

a) Execution plan  : W_ETL_DEFN
b) Subject Area     : W_ETL_SA
c) Tasks               : W_ETL_STEP
d) Indexes           : W_ETL_INDEX

In the upcoming post, I will discuss, how to make use these metadata tables. Will discuss about joins and key columns.

CHEERS :)

Related links:

More DAC Metadata or Repository tables part 1

More DAC Metadata or Repository tables part 2

More DAC Metadata or Repository tables part 3


Monday, March 24, 2014

Verify Informatica objects properties with MS Excel accurately

Today we will discuss some trick or tip...whatever you call it...But this will really helps a lot.

 People who works on Informatica might come across this situation frequently. Just spend some time on this post to gain knowledge. This will really helps you a lot.

Issue: I have developed 100 mappings for a project requirement. This includes, 

100 mappings design -200 sessions( One for incremental and one for Full load) - 200 workflow.

 Before moving to Testing phase, I need to verify the above developed objects accurately.

Verification includes the below.

1) Mapping Level

    a) Need to verify "sql override"
    b) Mapping name according my project naming convention.

2) Session Level:

    a) Incremental and full load session naming convention.
    b) Session Log File Name
    c) Parameter File name
    d) Recovery Strategy
    e) DTM buffer size
    f) Default buffer block size
    g) Source and Target connection values
    h) Target load type
    i) Truncate target table option
    j) Reject file name

3) Workflow Level:

   a) Failure strategy 

      - Fail parent if this task fails
      - Fail parent if this task does not run

I was worried on how to verify these many options individually for each and every objects.

After spending some time found some clues to do it quickly. This saves me lot of time and was so happy after this.

Solution: All just we need to open the exported xml using Ms-Excel and create report on the Informatica objects.

Follow the below steps to verify your informatica objects.

Step 1: Connect to Repository manager, open the folder and select your workflows and export it.


Informatica workflow export

Informatica_ExportXML

Informatica_ExportXML_to_folder

Step 2: Right click on file and select 

"Open with" -> "Microsoft Office Excel" 

Note: Before opening, remove the below line from the XML document.

<!DOCTYPE POWERMART SYSTEM "powrmart.dtd">

Open Informatica exported xml with ms-excel

Step 3: Now the excel popups a window saying select option. Just select last option "Use the XML Source task pane".

Use the XML Source task pane

Step 4: All elements existing XML file be displayed as Tree structure at right pane shown as below.

Informatica xml source window

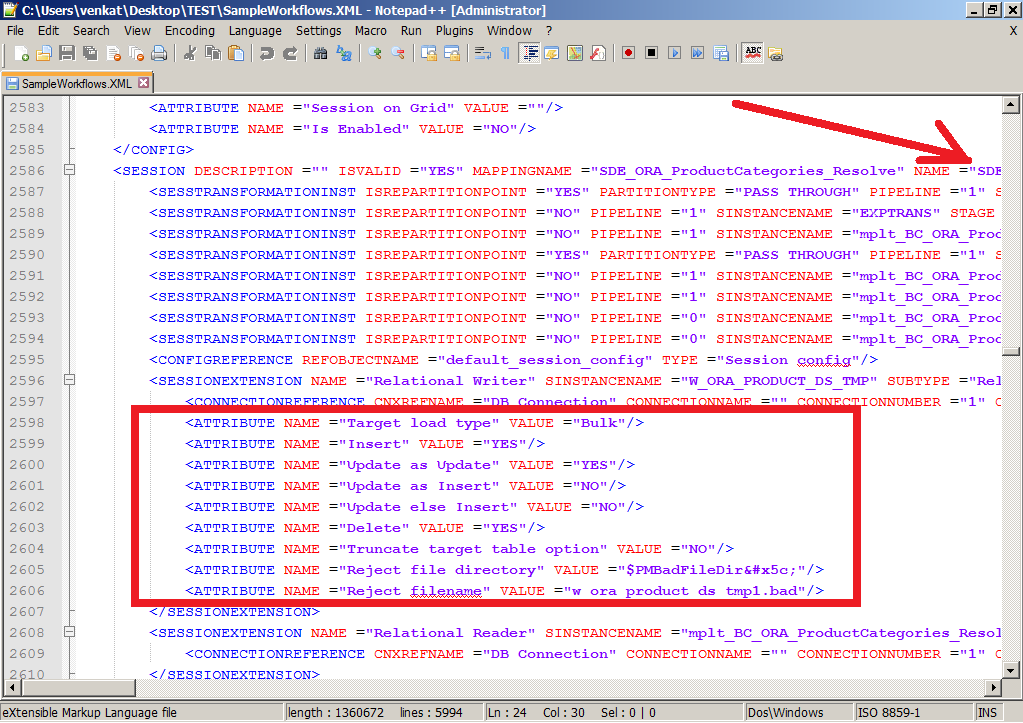
Step 5: Now we are almost done. All just we need to know intelligently to select the XML elements. Basically XML document contains every information. As shown in the below image, I am going to select some session properties.

Informatica workflow xml edit with notepad++

Step 6: Place your cursor in the first cell and double click the desired XML tag in the Right pane. Repeat the same steps for other Tags.

Selecting xml elements

Step 7: Finally Click on "Refresh All" button in the Data tab of Excel.

Click data refresh button in excel

Step 8: This will fetch complete information based on the selected as follows. Apply filter on the properties column and select the properties you want to verify.

 Here I am selecting "Source connection value","Target connection value","Session Log file name".

Filter out the data by selecting column values

Step 9: Finally you will get the report as show below.

Required properties values Report generated

Cool trick right..!!! 
When you have bunch of objects to verify the properties, this option will help you a lot.

CHEERS :)


Tuesday, March 11, 2014

Unable to synchronize task in DAC(Oracle BI Data Warehouse Administration Console)

Issue : Unable to synchronize task in DAC(Oracle BI Data Warehouse Administration Console) 
                                                    or 
No source and target tables adding in DAC after synchronizing the task.

Description: After synchronizing the task in DAC, showing "Success" message window. But the source and target tables are not populating in the "Source Tables" and "Target Tables" sub tabs.


Synchronizing the task:


Synchronizing task in DAC

Success message window:

Success message after Synchronizing task in DAC

No source tables populated/added in Source Tables sub tab.

After synchronising no source tables populated

No Target tables populated/added in TargetTables sub tab.

After synchronising no target tables populated

Solution: After spending some on this issue, I found some clue to resolve this issue.

a) By default when we install DAC(Oracle BI Data Warehouse Administration Console), it is selecting the path as 

C:\Program Files (x86)\Oracle Business Intelligence Data Warehouse Administration Console 11g\

b) When looked in to the DAC log file, as show in below path. The log file consist of below message

The file C:\Program could not be opened for read.
Failed to execute run. 

So with this we can understand, issue is with the spaces present in the DAC installation.( Program Files)

DAC log file for synchronizing the task

c) So uninstalled the DAC and installed in to a path where no spaces are present. Ex:- C:\OBIDAC\dac

Now the issue got resolved. After synchronizing the task I could see the Source and Target tables populated.

CHEERS :)

Related links:


Monday, March 10, 2014

Configuring Informatica client tools for the first time

In the earlier post we have seen creating Informatica repository service, Integration service and Installed Informatica client tools

So that's cool...Nothing much to do on the Informatica server again.

Now it's time to configure Informatica client tools to connect Informatica Server.

Please follow the below steps.

Step 1: From the start menu, navigate to the below path.

Start  -> Informatica 9.0.1 -> Client -> PowerCenter Client -> Power center repository Manager


Open Informatica repository manager from start menu

Step 2: From the start menu, navigate to the below path.


Informatica client Configure domains

Step 3: Configure domain window will be opened. Click on "dot lined square" button to add domain. Give the below details.

              Domain Name: Domain_win2008server
              Gateway Host: win2008server
              Gateway Port: 6005

 Click on "OK".

Informatica client Configuration domain,host and port number

Step 4: Previously created Informatica repository will be displayed to select. Select it. Then click on "OK".

Select available Informatica repository

Step 5: Now we are almost done. You can find the "InfoREP" repository is available in Informatica Repository manager to connect.

Informatica repository available in repository manager

With this we have successfully configured repository in Informatica repository manager.

CHEERS :)


Installing Informatica client tools

Installing Informatica client tools


Step 1: From the Software dump directory run "install.bat" file to start installation.

Run install batch file

Step 2: Select select "Install or upgrade to Informatica" and click "start" button.

Install Informatica

Step 3: Pre-requisites window will be displayed. Just click "Next" to continue.

Informatica client tools pre-requisites page

Step 4: Let the default option be there as is. Click "Next" button.

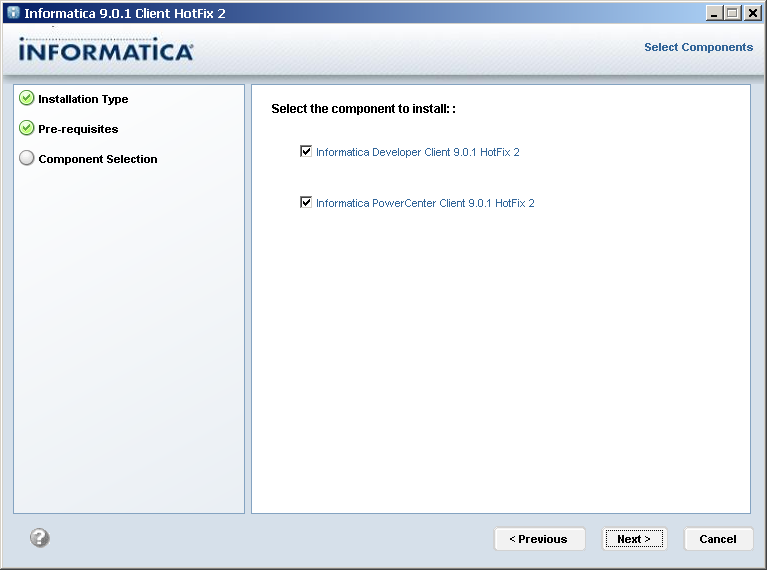
select the informatica components to install

Step 5: Select the installation directory and click "Next".

Informatica client tools installation directory

Step 6: Installation summary will be displayed. Click "Next" to continue.

Informatica client tools installtion summary

Step 7: Let the installation continue.

Informatica client tools installation progress

Step 8: Upon successful installation, success summary page will be displayed. Click "Done" button.

Informatica client tools installation success window

With this Informatica Client installation is completed. In the next post we will see how to configure Informatica clients for the first time.

CHEERS :)


Sunday, March 9, 2014

Creating Informatica Repository and Integration Service

In the earlier post we have completed Informatica server installation.

Now we will see how to create Informatica Repository Service as well as Integration Service.

Step 1: Login to Informatica Admin Console page using below url .( differs in your machine)

              URL:  http://win2008server:6007/administrator
              User Name: Administrator
              Password: Administrator


Informatica Admin console page login

Step 2:  Here no Repository and Integration services are defined.( Marked with red color area).

No repository and integration service created

Step 3: Click on Domain name, click "Action" -> "New" -> "Power Center Repository Service" to start creating Repository service.

Click here to create Informatica repository service

Step 4:  Give repository name like "InfoREP" and select Licence and Node from the drop down boxes. Click "Next"

Give informatica repository name

Step 5:  Provide the below details and Click "Finish" button.

              Database Type: Oracle
              User Name: inforep
              Password: Admin$1234
              Connection String: ORADB

Note: Before starting Informatica server installation, we have created two schemas.

           a) Infodom ( This will be used for domain configuration while Informatica server installation)
           b) Inforep  ( We are using this schema for creating repository service now)

Informatica Repository creation user name and password and database

Step 6: It will take few minutes to complete the process.

Informatica repository services creation progress

Step 7: Once the Repository service created, Make "Operating Mode" to "Normal" from "Exclusive".

Repository operiting mode to normal

Step 8: Now the repository will run in Normal mode.

Normal Mode: Normal mode provides full access to users with permissions and privileges to use a PowerCenter Integration Service.

Exclusive Mode: Safe mode limits user access to the PowerCenter Integration Service and workflow activity during environment migration or PowerCenter Integration Service maintenance activities.

Informatica repository is running

We have successfully created Informatica repository service. Now we have to create "Integration service" to complete

Step 9: Click on Domain name, click "Action" -> "New" -> "Power Center Integration Service" to start creating Integration service.

Click here to create Informatica integration service

Step 10: Give Name to Integration service, select Licence and Nod from the drop down box. Click "Next" to complete.


Step 11: Select previously created Repository, and give Username and Password. Finally click "Finish".
               Administrator/Administrator


Informatica integration service credentials

Step 12: Click on domain to see whether Integration service is running or not.

Check for repository and integration service running

 With this, we have completed creating Informatica Repository service and Integration service.

 Now the Informatica Service is ready to connect using Informatica Client tools.

In the next post we will learn about Informatica Client tools.

CHEERS :)


Wednesday, March 5, 2014

Informatica Server Installation with step by step screen shots

Topic: Informatica Server Installation with step by step screenshots.


Step 1: Download Informatica software from below site.


https://edelivery.oracle.com/

You need OTN(Oracle Technology Network) login details to download it from here. Use this software from here to learning purpose only. We should not use it in any production environment.

 Informatica is client server application. So you need to install Informatica server and client separately.

First we will install Informatica server then we install Client.

Important point to remember:

a) To have a good understanding of Informatica, we should aware of Informatica architecture at high level.


b) Informatica demands to schemas(user accounts of oracle) to complete the installation. One schema will hold "Domain" information and another schema will hold "Repository" information like folders,source tables, target tables, mappings, sessions, workflows..etc.

c) While installing Informatica server only domain schema will be used.

FYI: creating schema in oracle

CREATE USER INFODOM IDENTIFIED BY Admin$1234;
Grant dba to INFODOM;

CREATE USER INFOREP IDENTIFIED BY Admin$1234;

Grant dba to INFOREP;


Step 2:  After extracting Informatica software, run "install.bat" file to start installation.

Informatica server installation batch file

Step 2: Installation will start like this.

Informatica installation starting

Step 3: Select installation type as "Install Informatica" and click "Next" button.

Select Informatica installation type

Step 4:  It will display the pre-requisites window. Click "Next" to continue.

Informatica Installation summary

Step 5:  Select Informatica licence file and give installation path. Try to avoid spaces in the installation path.

Informatica license file selection and installation path

Step 6:  Installation summary page will be displayed. Click "Install to start installation.


Informatica Installation summary 2

Step 7:  Installation continues like below. Let it complete it.

Informatica Installation progress

Step 8:  Select "Create a domain" check box and uncheck "Enable HTTPS for Informatica Administrator". then click "Next" to continue.

Informatica domain creation

Step 9:  Provide the below details specific to your environment and click "Next" to continue.

Database Type: Oracle
Database User ID: INFODOM
User Passwor: Admin$1234
Database address: localhost:1521
Database service name: ORADB

Informatica domain creation parameters

Step 10:  After giving the above credentials click "Test connection" button to test the connection. You will get "The connection is successful" message window. Click "Ok" and click "Next" to continue.

Informatica domain creation test connection

Step 11:  Don't change any other details except Domain password. In my case I am keeping the user name as "Administrator" and giving password as "Administrator". Click "Next" to continue.

Informatica Domain user name and password

Step 12:  Uncheck "Run Informatica under a different user account". Click "Next" to continue.


Step 13:  After successful installation you will see the below summary window. Click on "Done" button.

Informatica installation success summary

With this you have just completed the installation of Informatica server. 

You need to create Repository service and Integration service to complete Informatica server configuration part. I will cover the rest in next post. Keep reading.

CHEERS :)